If you have a
Pro
or Enterprise Support Plan, you can
contact the
VirtualBoss service department and have them
walk you through these steps.
There are minor
differences from one model of router to another.
All routers have some basic things in common, and
will follow the 3 basic steps outlined below. Below
is an example of how to set up a common router (Netgear
model FVS318) to work with Remote VirtualBoss. Netgear
routers are used in many small business and home
offices. It is likely that you will not have this
exact router, but the example below will give you
a good idea of how the process works.
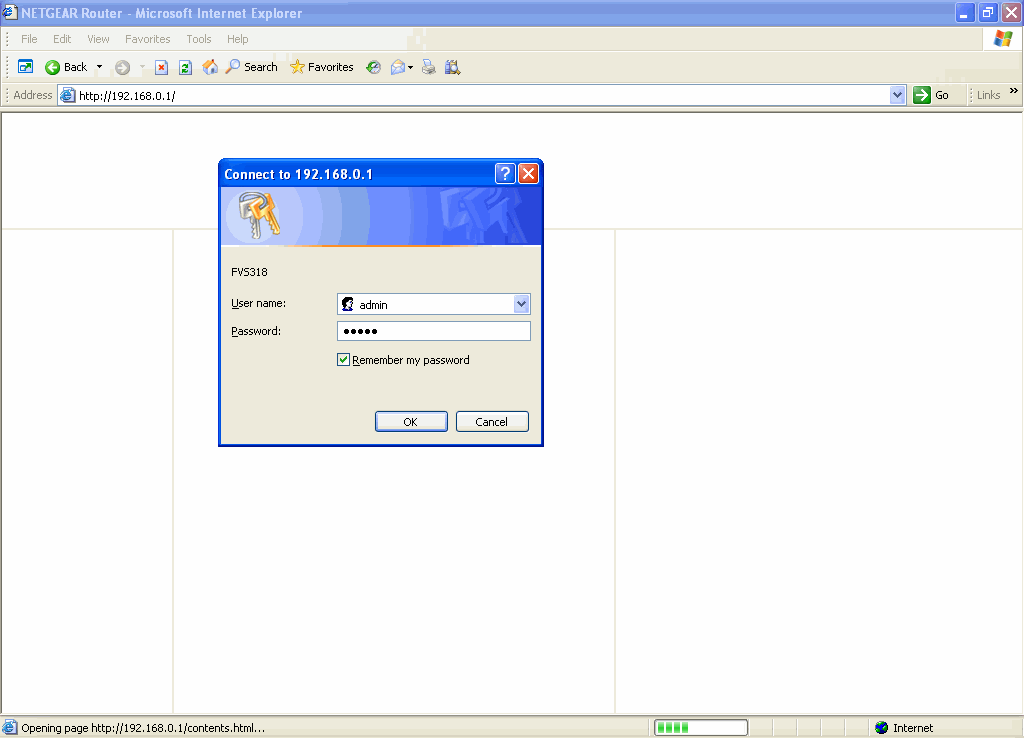
Step 1 - Log into the router
control settings |
| You can log into a router by going to its IP
address in your web browser (click
on this link to learn how to determine your
router IP address). With this Netgear router, the
IP address is 192.168.0.1.
When you enter this, you will see the window below. |
|
Router Login Window
|
|
|
| When you reach the router login window, you
will need to type in its user name and password.
Your router will have a factory default user name
and password that can be found in the router manual.
The router in this example has a default user name
of admin, and the password is also admin. If you
do not know your user name and password,
click here to
see a list of common factory default user name and
passwords. If the factory default user
name and password has been changed, you will have
to either know what it was changed to, or ask someone
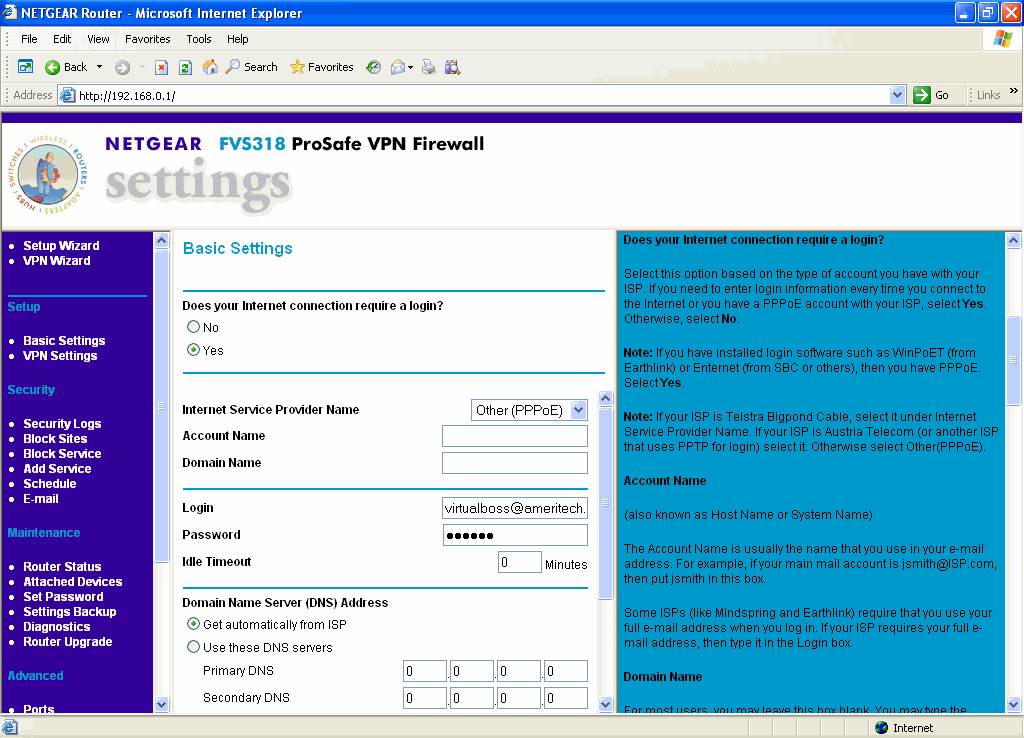
else who knows. Once you are logged in, the main
router settings window will display. |
|
Main Router Settings Window
|
|
|
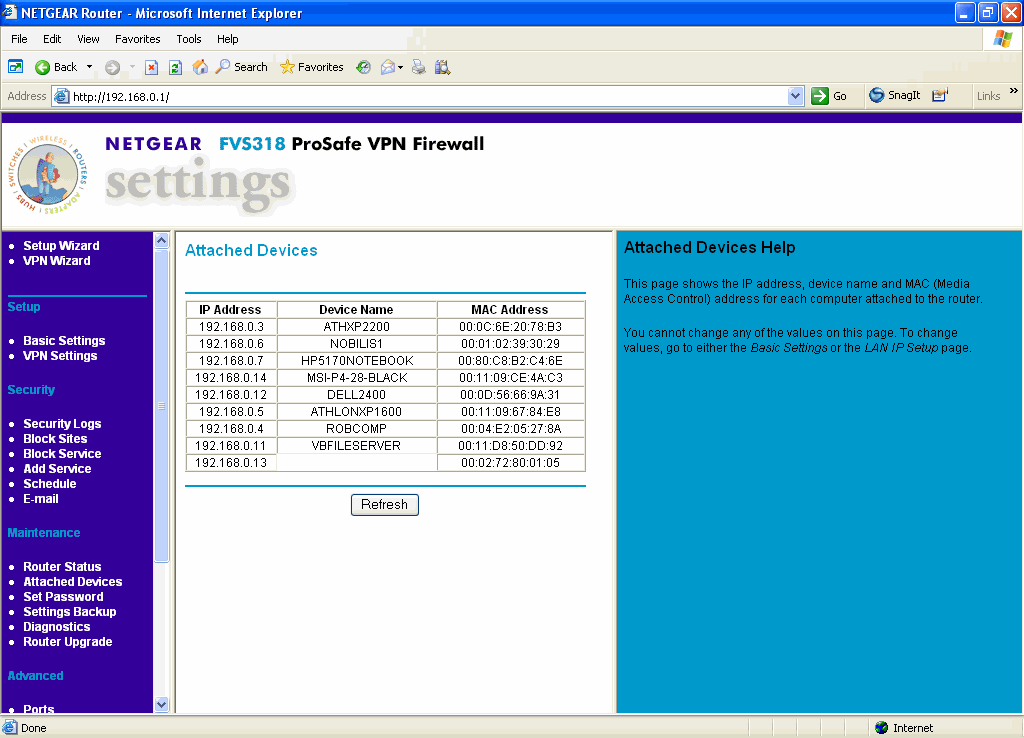
Step 2 - Reserve an
IP address for the Remote VirtualBoss server / computer |
Click on the Attached Devices menu on the
side of the screen. This bring up the Attached Devices
window. |
|
Attached Devices Window
|
|
|
| In the Attached Devices window, you can see
all computers that are attached to your router,
along with their IP address. Here we are looking
for the computer that will be acting as the Remote
VirtualBoss server. In this case, the Dell2400 with
an IP address of 192.168.0.12 and a MAC address
of 00:0D:56:66:9A:31 will be
the Remote VirtualBoss server. |
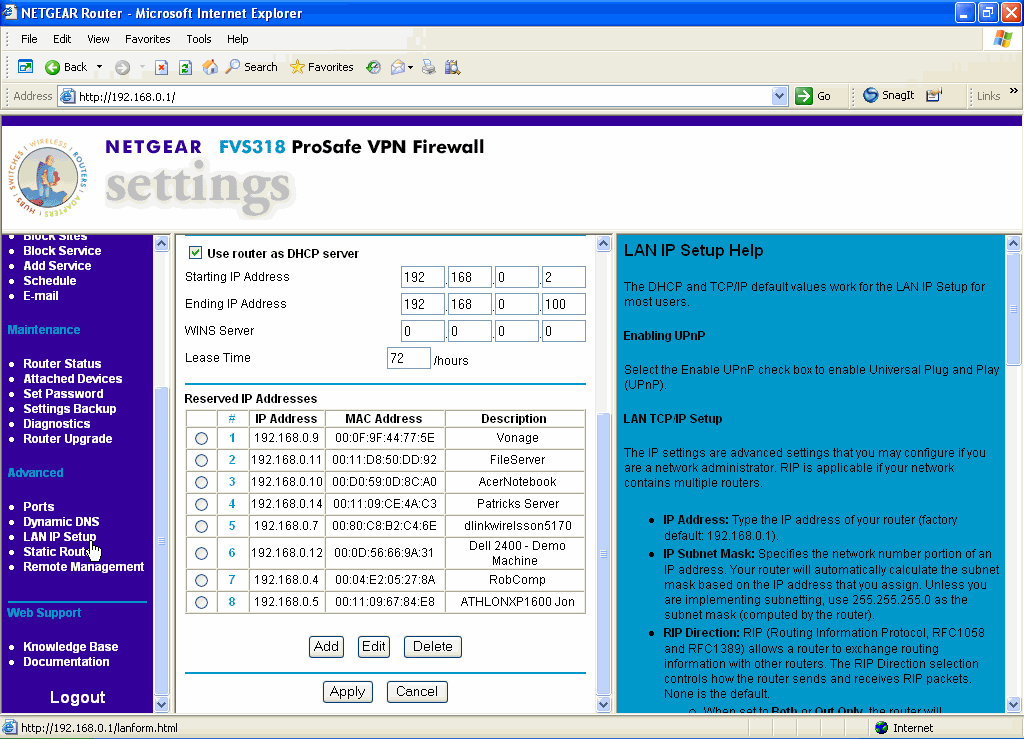
MAC addresses are hard-wired into each computer,
so they never change. The router assigns IP address
to each computer, so IP addresses can change. In
the next step, the router will be set to always
send Remote VirtualBoss requests (HTTP requests)
to the same IP address (in this case, 192.168.0.12).
Because of this, the router will be set to always
assign the MAC address 00:0D:56:66:9A:31
to 192.168.0.12. This way, all Remote VirtualBoss
requests will be sent to the Dell2400. |
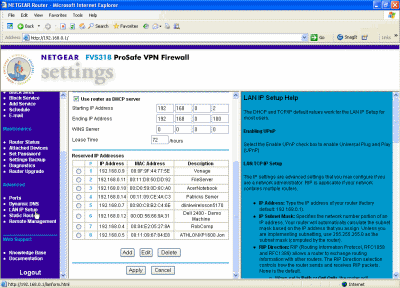
To set the Dell2400 to always have an IP
address of 192.168.0.12, click on the LAN IP Setup
menu item on the left side of the screen. It will
bring you to the LAN IP Setup window shown below. |
|
LAN IP Setup Window
|
|
|
| In the LAN IP Setup window, there is a section
that says Reserved IP Addresses. If the Remote VirtualBoss
server is not already assigned to an IP address,
click on the Add button and then enter the MAC address
for the VirtualBoss Server and the desired IP address.
Then click on Apply. In this example, we assigned
/ reserved 192.168.0.12 for the Dell2400. We used
192.168.0.12 because it is the same address that
the device is currently assigned to, which makes
things easier since you do not have to reboot the
computer. |
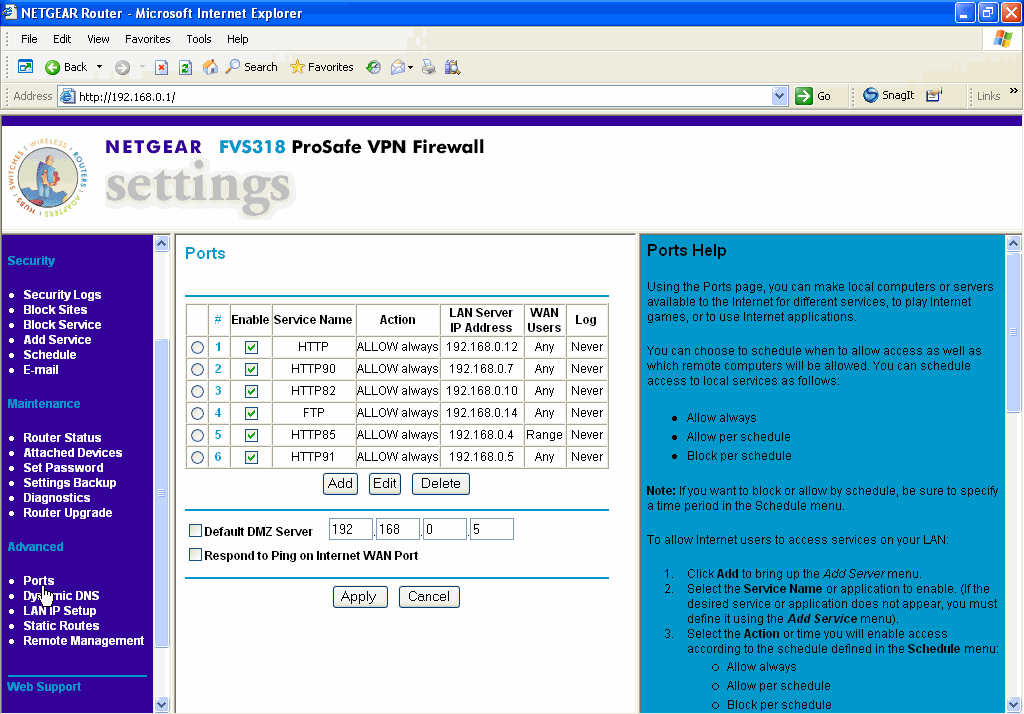
Step 3 - Set the router
to send Remote VirtualBoss requests to the Remote
VirtualBoss server
|
|
Next, set the router to send Remote VirtualBoss
requests (HTTP requests) to the Dell2400 (i.e.,
the computer with 192.168.0.12 for an IP address).
This is done in the Ports window. To go to the
Ports window, click on the Ports menu item on
the left hand side of the router settings window.
It will bring you to the Ports window.
|
|
Ports Window
|
|
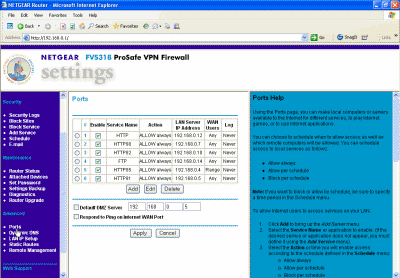
Click on Add, then choose HTTP as the service
you'd like to add. The local server address in this
example will be 192.168.0.12. Set the WAN users
to Any and click on Apply.
|
|
|
|
Return to the main help page for Remote VirtualBoss
|