VirtualBoss Capabilities
- Scheduling
- Punch List Management and tracking
- Service Management
- Work Order Management
- Project Management
- Contact Management
- Stop Payment Management
Setup time and learning curve
Our main goal with VirtualBoss is to provide a simple to use, easy to master, powerful scheduling solution.
With this in mind, we've made the software installation as straight forward as possible.
No lengthy install tutorials, no endless configuration lists, just a few next prompts is all it takes to get up and running!
Reading our Getting Started guide that appears on startup (and later under the help menu), can teach you the basics of using VirtualBoss in no time.
We also have helpful tips and guides on our
support page!
VirtualBoss not recognizing mapped network drives
This website has a great write-up and guide to fix this problem:
http://www.winability.com/how-to-make-elevated-programs-recognize-network-drives/
This Microsoft article explains why this is the case.
If the above website is no longer available, the easiest way to fix this problem and allow VirtualBoss to see your mapped network drive is to do one of the following:
- Turn off UAC (User Account Control)
- Change the VirtualBoss program shortcut to not "Run as Administrator". To do this, right-click on the program shortcut and go to properties. Under the compatibility tab, uncheck the box that says "Run this program as an Administrator".
System requirements
VirtualBoss was designed to run on very modest hardware. Here's a guideline of minimum recommended specs.
- Windows based PC (XP, Vista, 7, 8, 10)
- 2ghz or faster AMD or INTEL CPU (32 or 64-bit)
- 2GB RAM
The specs above are very minimal and most computers will far exceed these specs.
Getting Started
Once you have VirtualBoss installed, an easy to follow
getting started guide will appear.
You can use this as a handy reference guide whenever you need it. New information is added to this guide on a regular basis.
QuickBooks Synchronization / Troubleshooting
VirtualBoss works with QuickBooks to sync your Contact and Job information between the two softwares.
Before you are able to sync your information with VirtualBoss, you need to set up a certificate with QuickBooks.
Here are the steps you need to follow before you can sync.
- QuickBooks needs to be open on your Computer and logged in as the Administrator. This is important. Only the Admin login to QuickBooks can allow applications to set up a certificate for syncing.
- VirtualBoss needs to be installed and running on the same computer.
Once you have achieved the above steps, it's time to initiate the sync process. In VirtualBoss, go to File, then QuickBooks Synchronization.
Problems When Attempting To Sync
Depending on your computer setup, you may encounter a problem when attempting to sync your VirtualBoss software with QuickBooks.
Here are some common issues you may run into, and how to solve them.
Can't Open QuickBooks
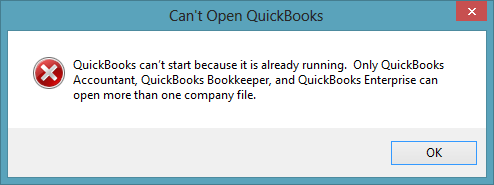
If you encounter this error, please follow these steps.
- Close VirtualBoss and then Right-Click on the program shortcut and go to Properties.
- Under the Compatibility tab, un-check the box next to Run this program as an administrator. Then hit Ok.
Now open VirtualBoss again and go to Options, then QuickBooks Synchronization.
QuickBooks Is Not Running.
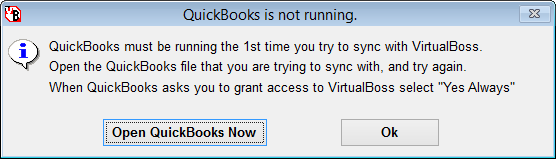
If you see this message, check to make sure that you have QuickBooks already opened.
This message may appear if you have QuickBooks opened, but are not logged in as Administrator.
Error (Line 1232): Could not start QuickBooks...
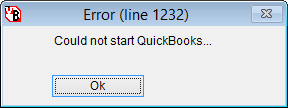
This message is often seen if you have not initially set up VirtualBoss to sync with QuickBooks.
Please see the beginning of this section.
This message can also appear if you are attempting to sync for the first time and QuickBooks is not running.
Pricing
Pricing for VirtualBoss is based on how many Licenses you will need.
A User License allows one person to access your data at a time.
A single User License is normally $395.00. As part of our
latest release promotion, you can buy a single User
License for
$299.95.
VirtualBoss on a network
VirtualBoss can connect to a database on your computer, or another on your network.
You do not need to install VirtualBoss on the computer you'd like to host your data, simply copy or create a new database from any computer that has VirtualBoss on it.
We recommend to host your data on a server (this is not required), or a computer that everyone can access.
Remember, if the computer that is hosting your database is turned off, you won't be able to access your data!!
Using VirtualBoss over your network will allow multiple users to view and change your data simultaneously. (this requires additional licenses)
VirtualBoss on a Mac
VirtualBoss can be run on a Mac, but you'll need special software that allows this.
One suggestion is a program called
Parallels.
This will let you run Windows programs (like VirtualBoss) on your Mac.
Entering Tasks
Entering Tasks in VirtualBoss is essential for building your schedules.
Tasks are entered on the Task Manager List Screen.
Simply hit
Add a Task to begin.
A Task Detail Window will appear which needs to be filled out.
To view a full guide on creating Tasks, see this
tip.
Creating a Schedule
Linking Tasks
Adding Tasks to a Job is the first step to creating a schedule.
Sometimes, you want Tasks to follow other Tasks.
This can be accomplished with
Task Linking.
When you link a Task to another, the start date is controlled by the previous Task!
By using this method, you can create schedules that automatically update when you make a change.
Adding a New Job
There are a few ways to add a new Job.
The easiest method is by going to the Job Manager, click on Add a Job, and give it a meaningful name.
That's all there is to creating a new Job! You'll notice other information you can fill out for your new Job, but to keep things simple, all you need is a name.
Now you're ready to start adding Tasks to this Job.
Duplicating a job
Tasks and Jobs can be duplicated, minimizing the work needed to start a new Job.
If your jobs are similiar, only needing a few small changes or tweaks, then duplicating older Jobs is a great timer saver.
If the Job Manager, click on the Job you want to copy. Right-Click and choose "Duplicate this job and all of its Tasks".
You'll be asked to enter a new name. Once copied, your new Jobs Tasks can be found on Task Manager Screen.
Task ID and Task #s
You are likely to encounter Task ID and Task #s while using VirtualBoss.
The main difference between Task ID and Task #s are as follows.
Task IDs are unique and automatically assigned when a Task is created.
Task #s are assigned by the User and are primarily used to give order to your schedules.
You cannot change Task IDs but you can change Task #s.
Task #s are not required, but using them opens up many options that make viewing and manipulating your schedules much easier.
For example, using Task #s you can order a schedule exactly how you want it to appear by assigning each Task a Task #. (1, 2, 3... or 5, 10, 15, 20...)
You can sort entire jobs by the Task #, ensuring they appear or print in the order you assigned. Task IDs are used to identify between duplicate Tasks.
Many new Users will commonly use Task IDs as a way to order a schedule, instead of the recommended Task #s.
This will quickly lead to trouble as Task IDs do not maintain a logical flow over time (when a task is deleted, that ID number is goes with it and is not reused).
Printing Work Orders & Schedules
You can Print or Email entire Jobs as either individual Work Orders, or as a single Schedule. This simple tip will help you figure out what you are printing/emailing:
VirtualBoss emails or prints every Task that is visible on the Task Manager List Screen.
This means that if you have 5 Jobs with hundreds of Tasks showing, everyone one of them will be emailed or printed. (Remember: VirtualBoss shows all Active Tasks by default)
Everytime you go to print or email work orders or schedules, remember to use the Filter Options to show exactly what you want to send before you go ahead with it.
Get in the habit of Filtering to the Job you're currently working on, this helps in other ways too!
To actually print or email Tasks, go to Print/Email/Fax button from the Task Manager List Screen.
You can choose work orders or schedules (this determines what the Tasks are generated as), and decide who you would like to send them to.
Viewing a Gantt Chart
The
Gantt Chart is the sister view to the Task Manager List Screen.
You can view all information showing on the Task List on the Gantt Chart by just pressing the Gantt Chart button.
You can do all major scheduling changes directly on the Gantt Chart.
You may find Task Linking to be easier on the Gantt Chart as you can create Task Links by simply dragging and dropping Tasks to create critical paths.
Network Setup / Using VirtualBoss over a Network
VirtualBoss can access databases over a local network.
You can have multiple users accessing the same information at the same time. No special installation required.
To access a networked VirtualBoss database, go to File - Open Database - Open Other Database.
This will bring up a file explorer where you can browse to the location of your database. By default, VirtualBoss creates a blank database with the name "defaultData" located at "c:\Virtualboss\Data\defaultData".
You will need to share this folder so other network users can access it. You don't have to use the default database either; you can create a new database directly in your existing network share.
(choose the shared location when creating a new database or else it will be created locally)
For simultaneous access to a shared database, you will need a software License for each user.
A single user License can be used to install VirtualBoss on multiple computers, but only one person could access a database at the same time.
With more than one License, you can have more than one person connect and view the same data at the same time while making changes.
Importing and Exporting
In order to export and import data into VirtualBoss, you'll need Microsoft Excel.
Trial versions and student editions of Excel do not work as the importing/exporting options are disabled.
Exporting and Importing your Tasks, Contacts, or Jobs, provides some great time saving techniques.
There are a few rules to follow, depending on what you're doing.
For example, importing Tasks into VirtualBoss will check to see if incoming Tasks have Task IDs assigned on the Excel sheet.
If so, these Tasks are updated in VirtualBoss instead of making new ones. If you would like to make new Tasks, just blank out the Task IDs from the Tasks before importing.
VirtualBoss will automatically treat these as new Tasks and assign Task IDs to them. Please do not manually enter Task IDs, VirtualBoss will do this for you.
Backing up your data
VirtualBoss automatically backs up your data whenever you shut down the software.
This is the default setting. You can change the frequency of backups and the save location by going to the backup tab in the program preferences.
You can restore your database completely from any backup file.
These files are timestamped so you know exactly when they were created.
It's also good to note that VirtualBoss saves all data as you enter it in!
Creating a New Database
To create a new Database, go to File, then Open Database.
Click on Create New Database. You'll be asked to give it a name and where you would like to save it.
While it's perfectly fine to use more than one database with VirtualBoss, be aware that contacts, tasks, and jobs, are not shared between them.
When you create a new database, you are effectively starting fresh.
Upgrading your software
VirtualBoss requires a
Support Plan in order download our latest releases.
Licenses can upgraded by
purchasing a 1-time upgrade or a support plan from our web store.
Unlocking/Registering VirtualBoss
Unlocking VirtualBoss is an easy 2 step process.
When you first install the software, you'll be in trial mode and asked to enter your User License #.
This is emailed to you shortly after purchasing the software. If you need to know what your license #, you can
contact support to find out.
Once you've entered your User License #, you will be
unlocked. The last step is registering your software online.
After entering your license #, you'll be asked to Register Online. After registering your new install, you will be ready to start using the software!
If you skipped registering online, you can find this option by going to Options, then License Registration.
Program Errors
Resource File Version Mismatch + Visual FoxPro Cannot Start. Could Not Load Resources...
If you recieve these errors during installation of the software or when attempting to open VirtualBoss, please follow these steps to resolve the problem:
- Try re-installing the software. In most cases, this will install the missing files and fix the problem
- If the above doesn't work, please see below
This problem can occur when a different version of the FoxPro resource files exist in the Windows\system32\ folder, which differ from the program runtime version.
The solution is to remove any files with a "vfp9" in the file name in your Windows\System32\ folder.
Removing these files should correct the error. (We recommend to run the VirtualBoss installer again after removing these files)
OLE errors: These errors often occur due to operating system restrictions.
OLE Object is being ignored Record #6
OLE Error OX80040154 Class not registered
OLE anything ...........................
OLE error codes vary depending on the setup of your
computer. They are generally not difficult to fix. The easiest and quickest solution to try would be to re-install VirtualBoss.
Note: You will not lose any information by re-installing.
Other Errors
The majority of errors you are likely to encounter are most likely related to account restrictions on your computer.
Permissions VirtualBoss needs to run are not set when installing.
This could be caused by having the "User Account Control" option on (this is the default setting for new computers).
This can restrict any program that is installed/run from the "Program Files" or "Program Files (x86)" folders.
To fix these issues, re-install VirtualBoss to the local c:\ folder. Or, right click on VirtualBoss and choose "Run as Administrator".
This is a temporary fix, but a good one to test to see if your program doesn't have the required privilages to run.
Please note, that even if you have an "Administrator" level account, your programs can still suffer from this problem if the User Account Control option is enabled.
You can turn off User Account Control in the Control Panel of your computer (under Users).
Contact us if your problem is not covered here.
VirtualBoss API/SDK
VirtualBoss API / SDK
If you would like to link another program to VirtualBoss you can use our API (application program interface)/SDK (software development kit), Go to
www.virtualboss.net/api for more info. It's quite technical, and is written for software programmers and developers, not end users.
Still Have Questions?
For additional help instructions go to the Help menu when running VirtualBoss. You can also
Email your questions to our support staff and we'll respond as quickly as we can.